360° Panoramic Painting (Process)
Click here to View Image in 360° (Facebook)
Here is the process of my 360° panoramic environment painting.
Most of the information can be found on the PanoPainter facebook page. An amazing program, go check it out!
https://www.facebook.com/panopainter/?fref=ts
*All the download and youtube tutorial links can be found there.
Everything was painted in photoshop, as a flat image. I just used PanoPainter as a panoramic image viewer, to check and see if everything was working and connecting correctly. PanoPainter supports many image files, including jpeg and psd. I prefer dragging my photoshop file right into PanoPainter because each time the photoshop file is saved, it will automatically update the file in PanoPainter. So I keep the program open as I am painting in photoshop, makes it easy to see if everything is working in 360°.
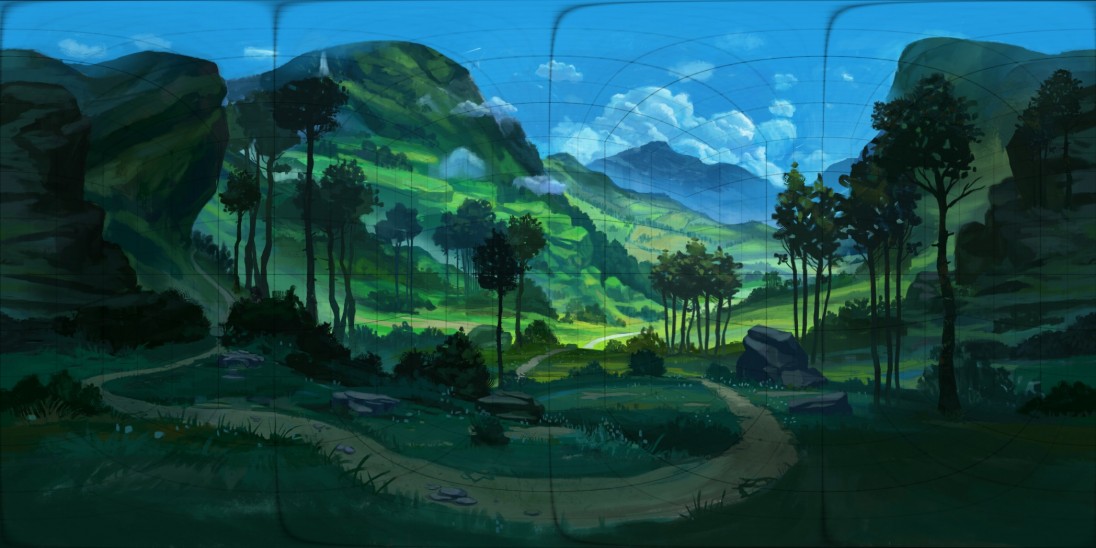
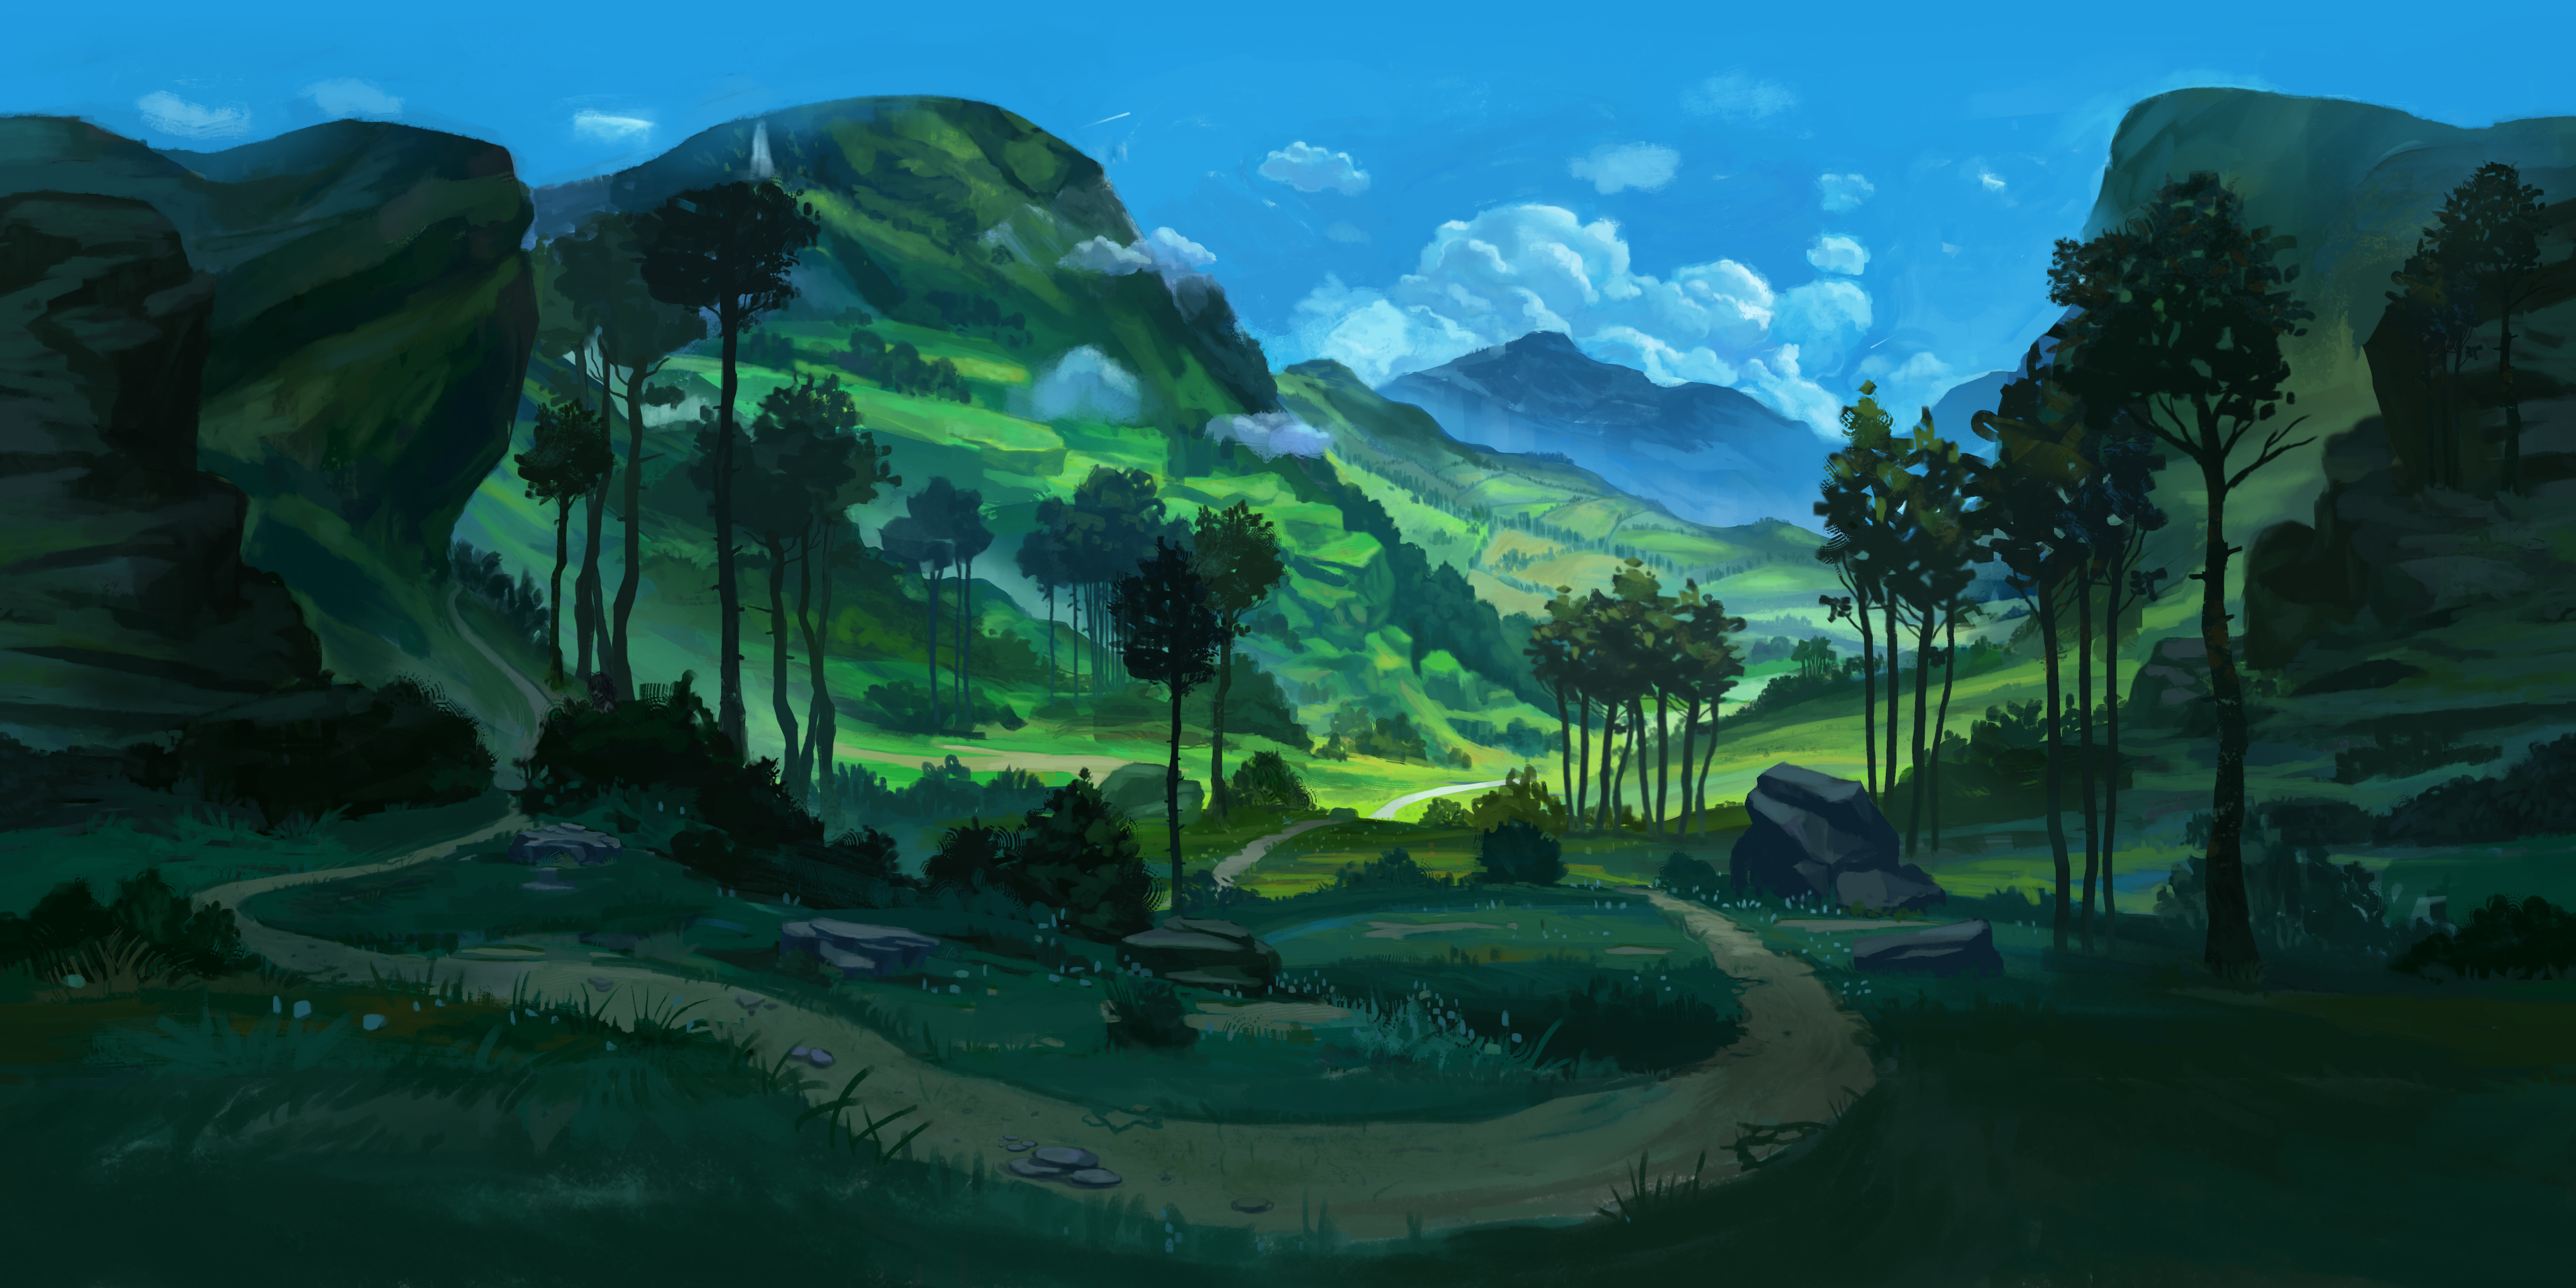
Bellow is a flat image, what I was painting in photoshop.
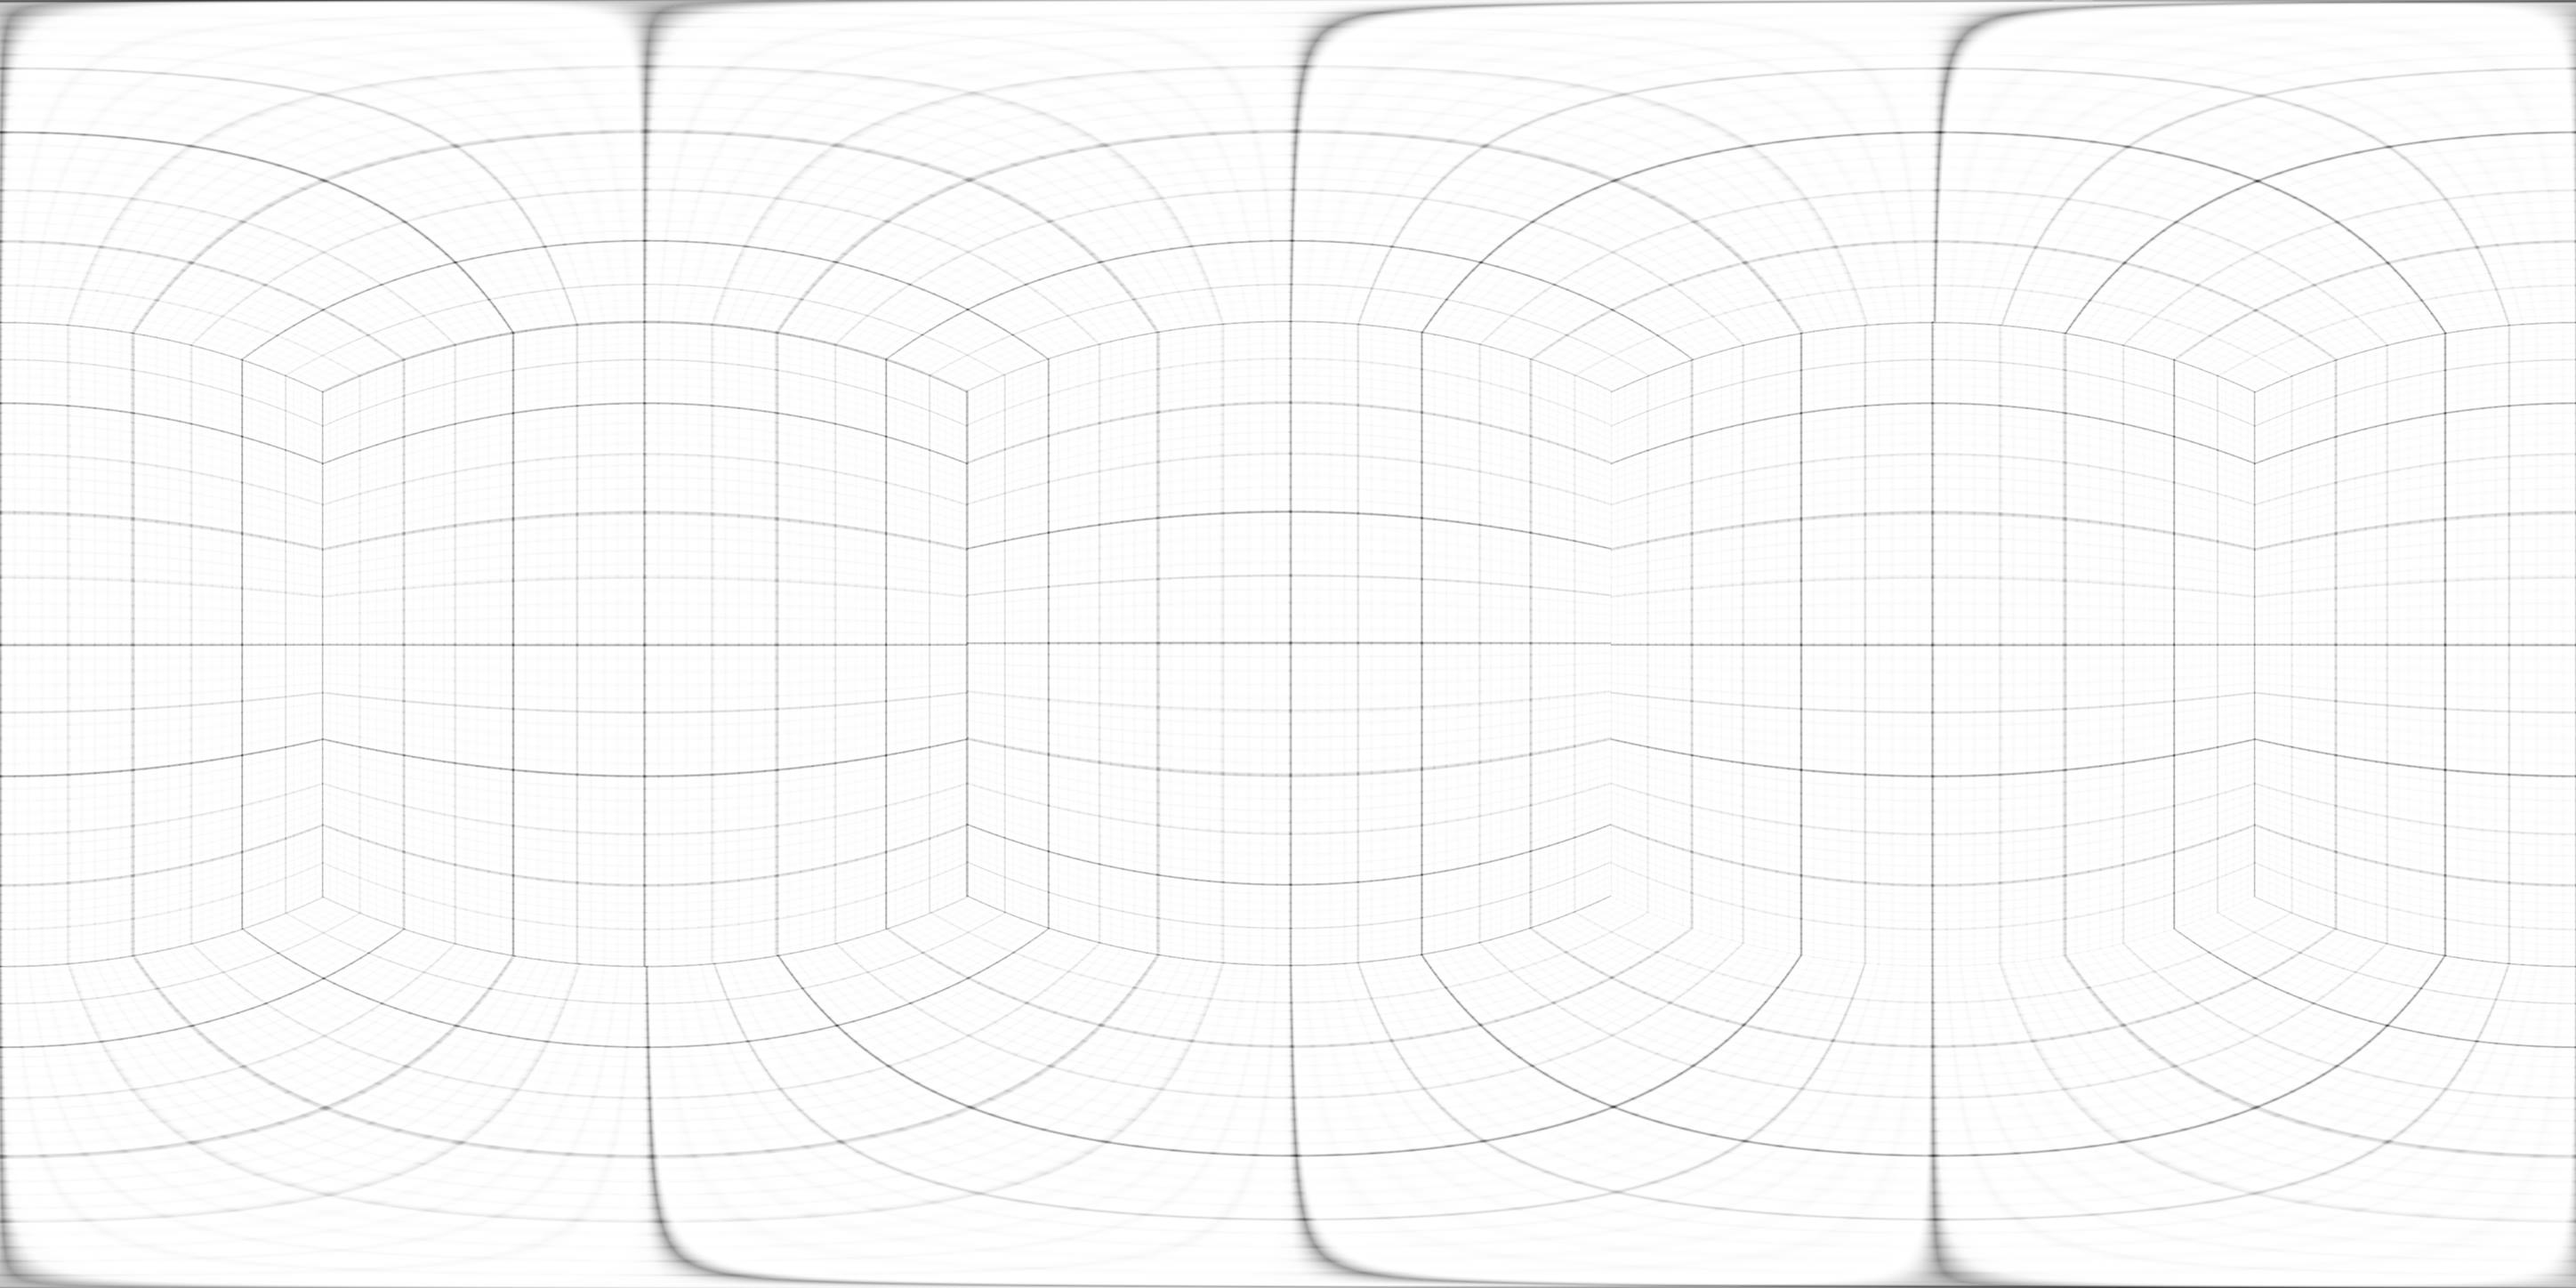
I used a grid (found on PanoPainter) as my guide.

Grid Below. For transparency, set the grid layer mode to Multiply
The top and bottom edges of the image are the most challenging to paint. Funky warping stuff happens in these regions. Generally you want to keep the top and bottom edges one solid color so everything connects seamlessly when the image is wrapped around. However, I decided to give myself a challenge and made the ground detailed. A bunch of trial and error.
Save yourself some cash and also support this website by getting the Ebates plug-in for your web browser. Earn up to 25% cash back from your favorite online stores (Amazon, Ebay, Best Buy, Target, Barnes&Nobles, etc.) + Get a $10 Bonus by using this referral link! It’s completely free to signup. There is nothing to lose, only cash to gain!
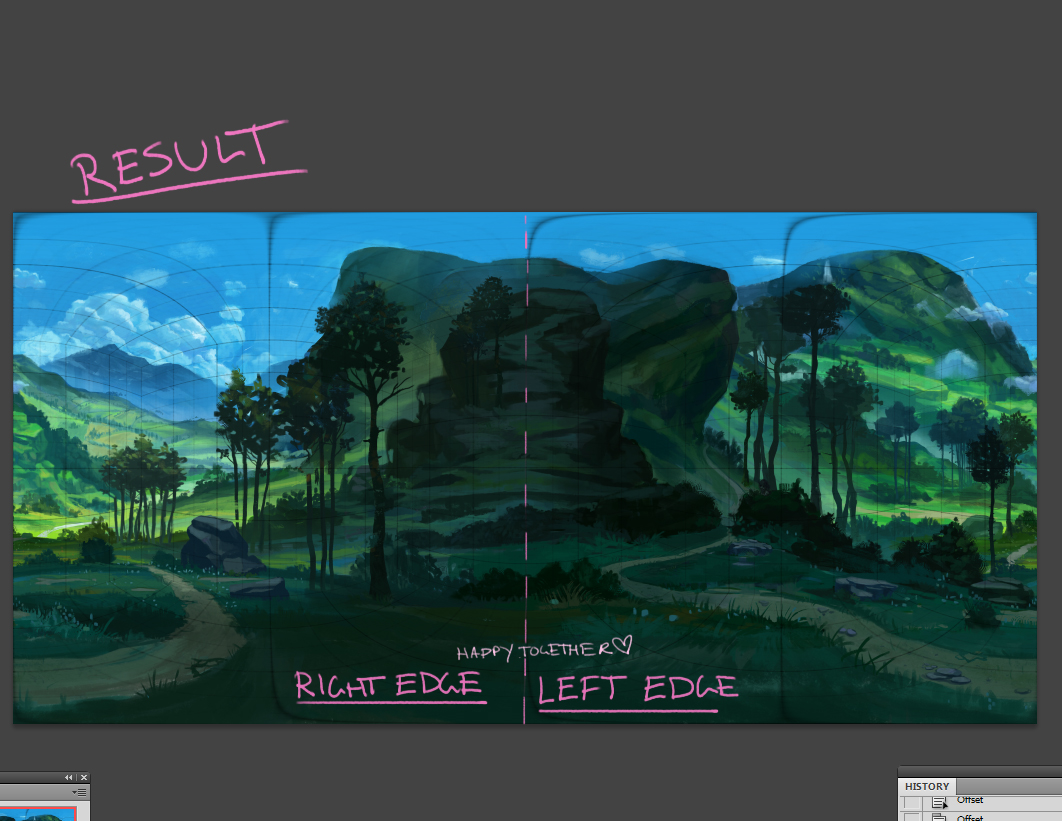
Another challenge was making the left and right side of the image mesh together when wrapped around. I was just doing a bunch of trail and error painting until both sides fit together. This can take a long time and be quite frustrating! However, I learned, with the help of a friend, that there was a much easier process.
To make the left and right edge mesh together seamlessly, use offset, which is found under filter>other>offset
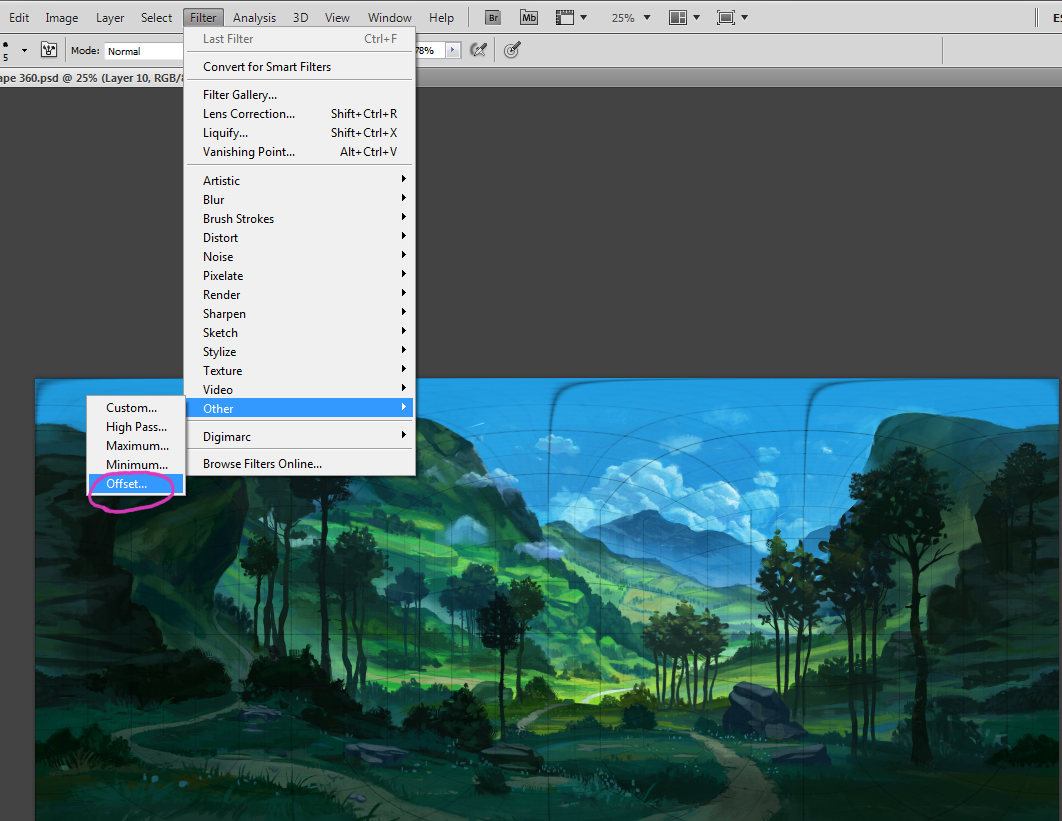
For the horizontal value, enter half the size of the width. In this case the width of my painting was 4096 pixels, so half the value would be 2048.
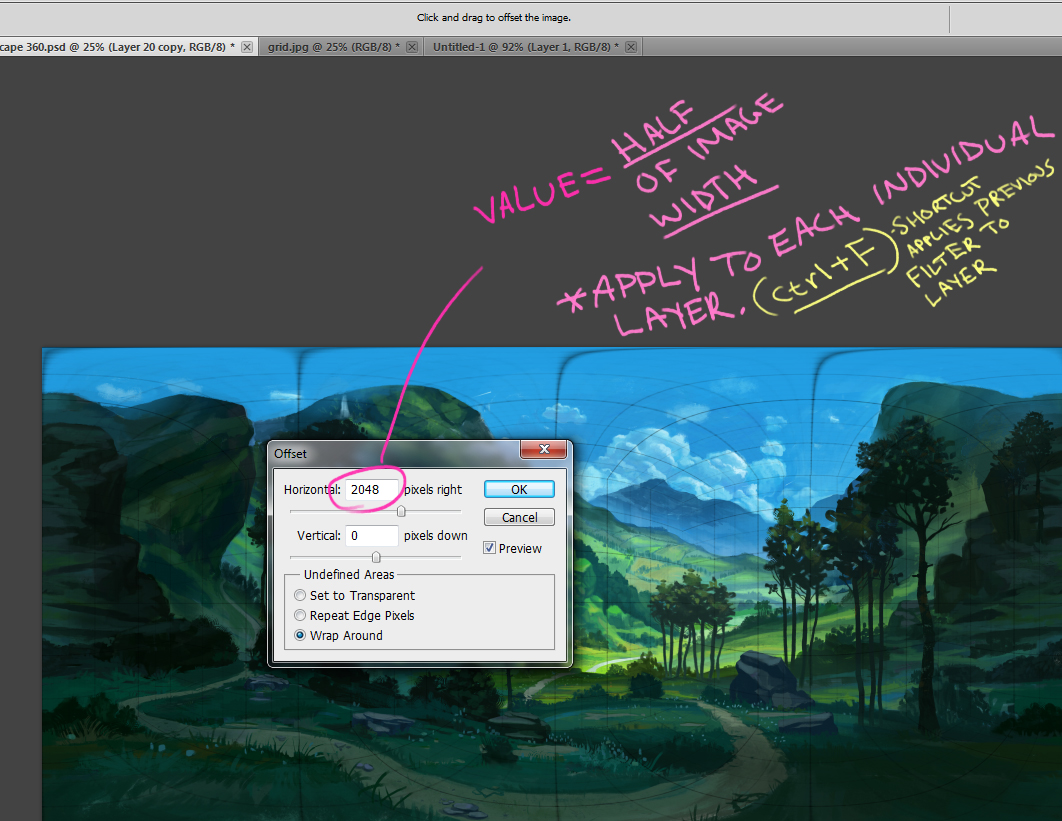
You have to individually apply the offset to each layer. I wish photoshop made an option to apply it to all layers. To implement the same filter to each layer, use the shortcut (Ctrl+F). Saves time.
*This will NOT work on hidden layers.
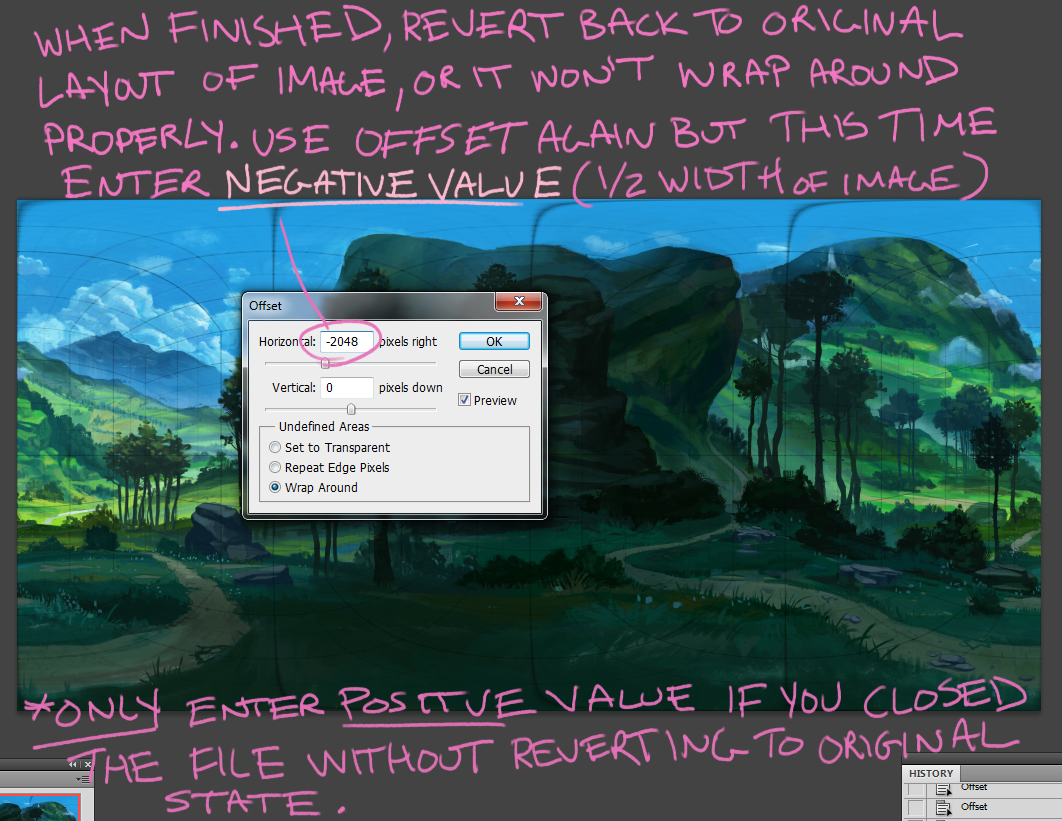
*After you are finished working on the offset version, make sure to revert back to the original position of the image, or it will not wrap around properly. Do the same as above but enter a NEGATIVE horizontal value (1/2 width of image). If you happened to save and quit the image without reverting to the original state, enter a positive horizontal value instead of negative. Don’t ask me why because I don’t have an answer.
That’s about it. Again, a lot of the painting is trial and error. Have Fun!
To upload an interactive 360° panoramic image to face book, watch this tutorial
To upload it to a personal website (with iframe support), use this website https://www.2vr.in/ | when uploading, for “Camera Used” section, select ‘Ricoh Theta S’
You can use a virtual reality headset like Google Cardboard or HTC Vive for viewing.
Or use Marmoset Toolbag / Viewer to develop the image (A little bit trickier). This viewer supports proper mobile phone use.
( If you found this content helpful, please support my art and website by shopping on Amazon Or Making a donation via PayPal. 
 Thank you! )