Animation -Waterfall- Process Included
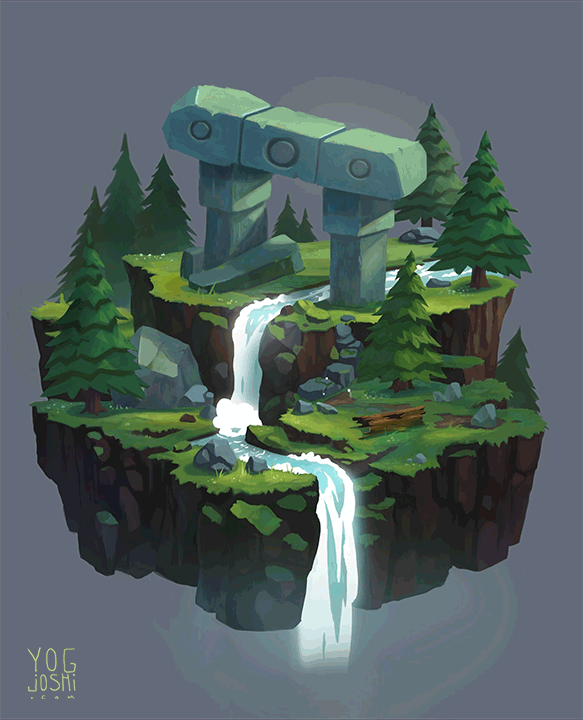
Here is my first animated environment. Everything was made using photoshop. Though it took a really long time to create, I enjoyed the process and learned a lot! Regardless of my rusty animation skills, I hope you can enjoy the overall mood. Down below is a brief explanation of how I approached this work.
A GIF of the animation and A video with sound
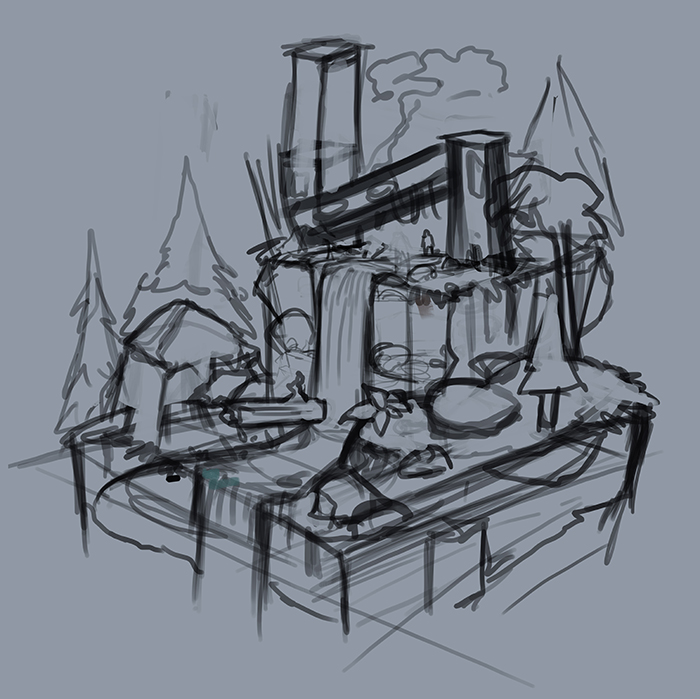
Here is a very rough sketch of the scene. Initially, I had no plan to animate. I just wanted to create a finished environment illustration.
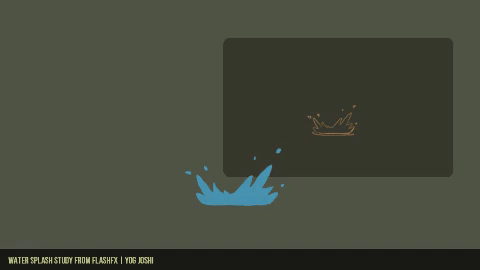
However, during the same time, I started practicing some animation. I always had a desire to bring my environments to life by incorporating some animation into the scene. I started off by doing a water splash study from Flashfx.Blogspot (Its an amazing tutorial, I highly recommend checking it out). After understanding a bit about fluid dynamics, I was inspired to animate the scene above.
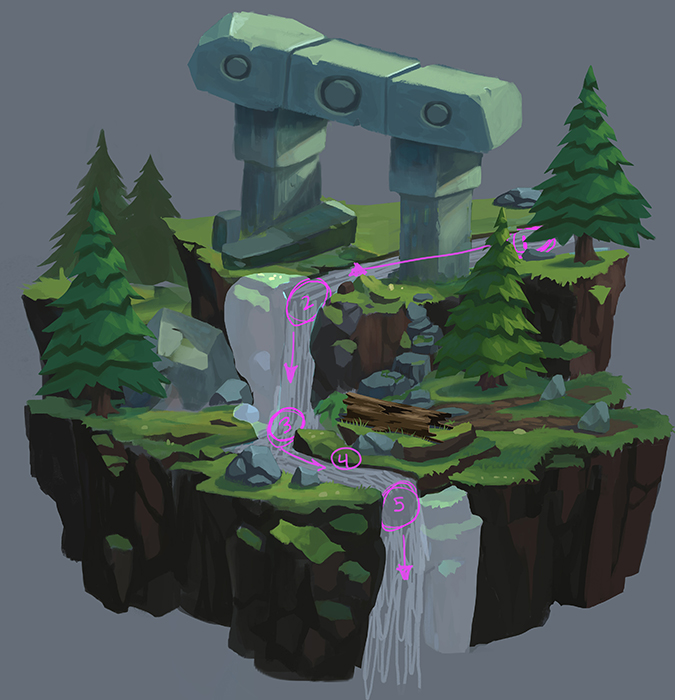
Here is a rough map-out showing what areas of the stream/waterfall I wanted to animate. The animation was broken down into 5 parts. 1) the stream at the top going right to left, passing under the prehistoric monument. 2) the top water fall 3)the mist/splash at the base of the fall 4) the stream following it 5)the second water fall (a copy of the first the fall but just offset by a few frames so it doesn’t seem synchronized).
The speed of the entire body of water is 10 frames per second. Some parts of the running water are 5frames and other parts are 10. This allows a variety in the speed, giving the water a more fluid and organic appearance. If the animation sequence of everything was 10 frames long, the movement of the water would appear calculated and not feel natural.

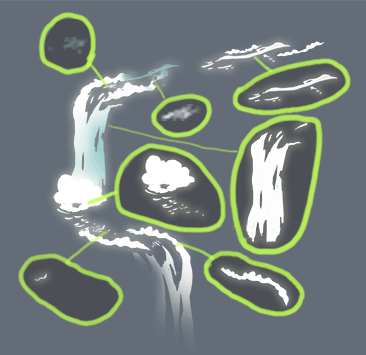
I only used these 7 sequences to create the entire body of water. I reused some by flipping them horizontally and or offsetting the frames.
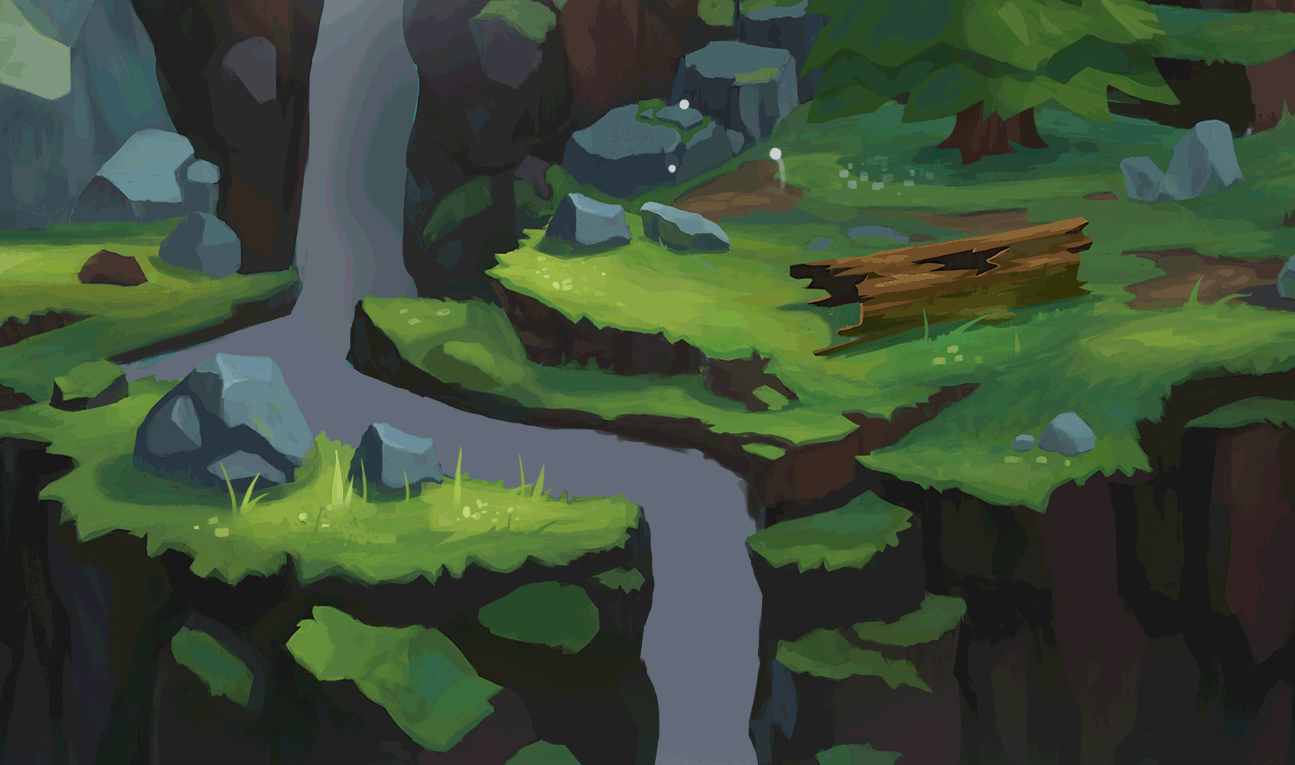
Later on I decided to add moving grass and flies to the scene. Just some subtle detail to make the environment feel more believable. Again I altered the frame lengths for each element. One of the flies’s length is actually 20 frames.
For animating in photoshop I used the video timeline and an animation plugin called AnimDessin2 (link to source files and installation instructions). Photoshop isn’t the best software for animation but it is fairly straightforward and a good place to start. Soon I will upgrade to a more efficient software like Adobe Animate or TVPaint.
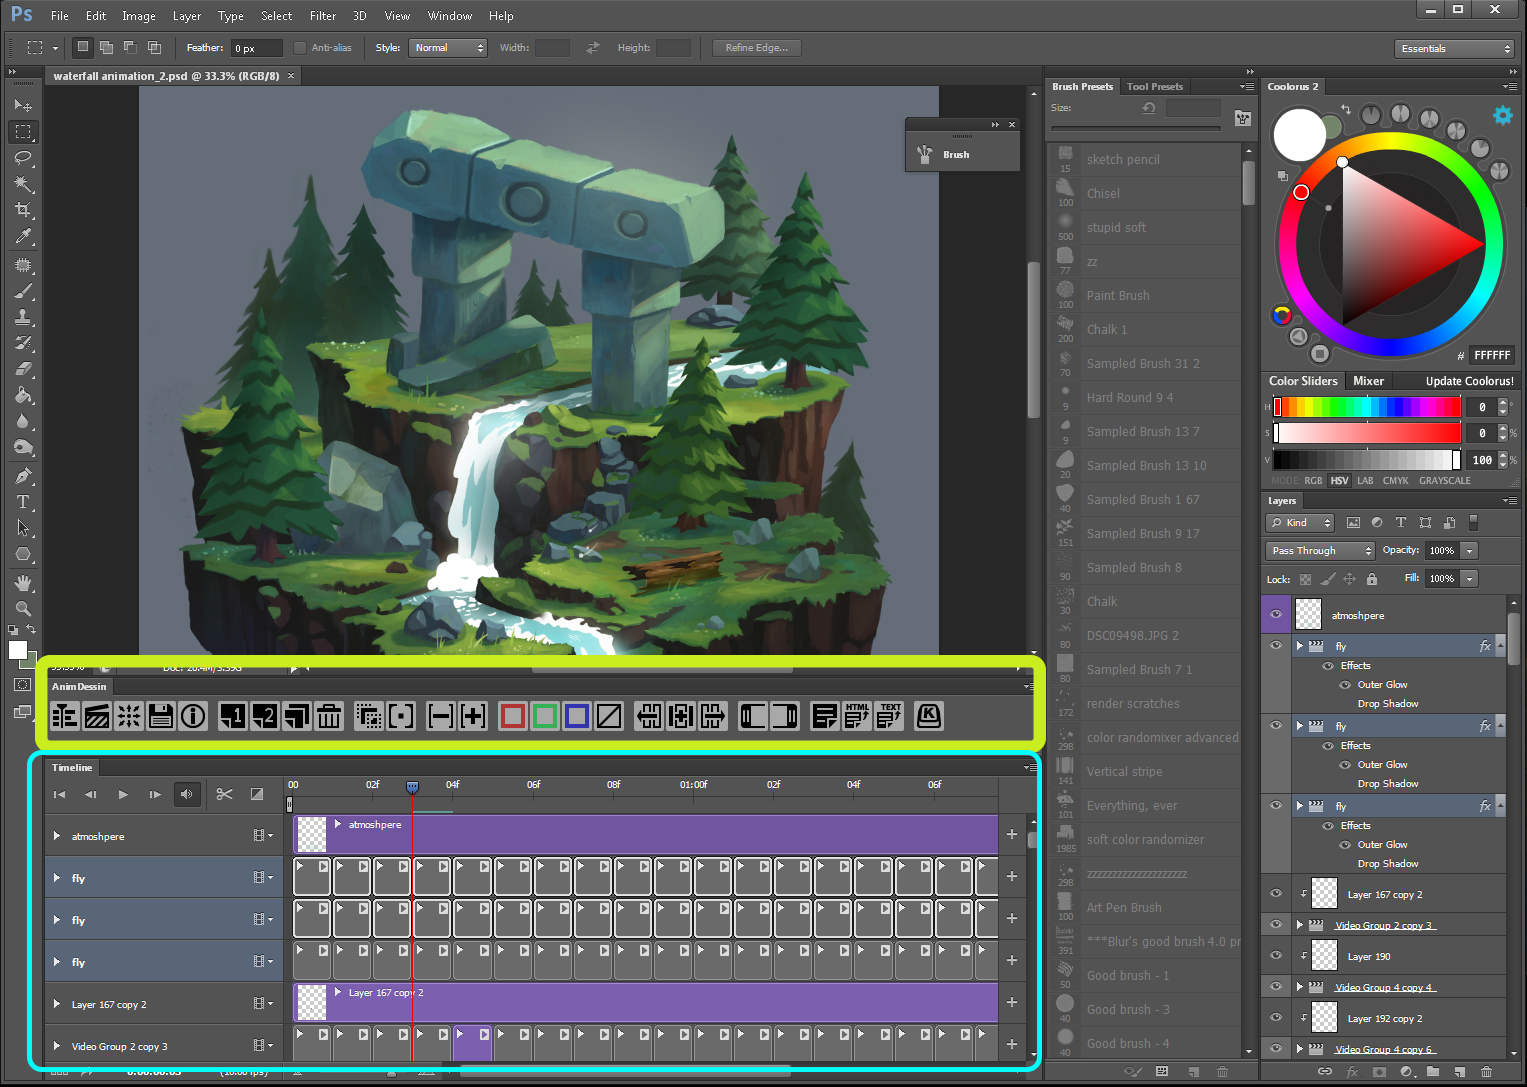
Here is tutorial that shows you how to use AnimDessin
A video I posted on Instagram, showing the first stage of the animation.
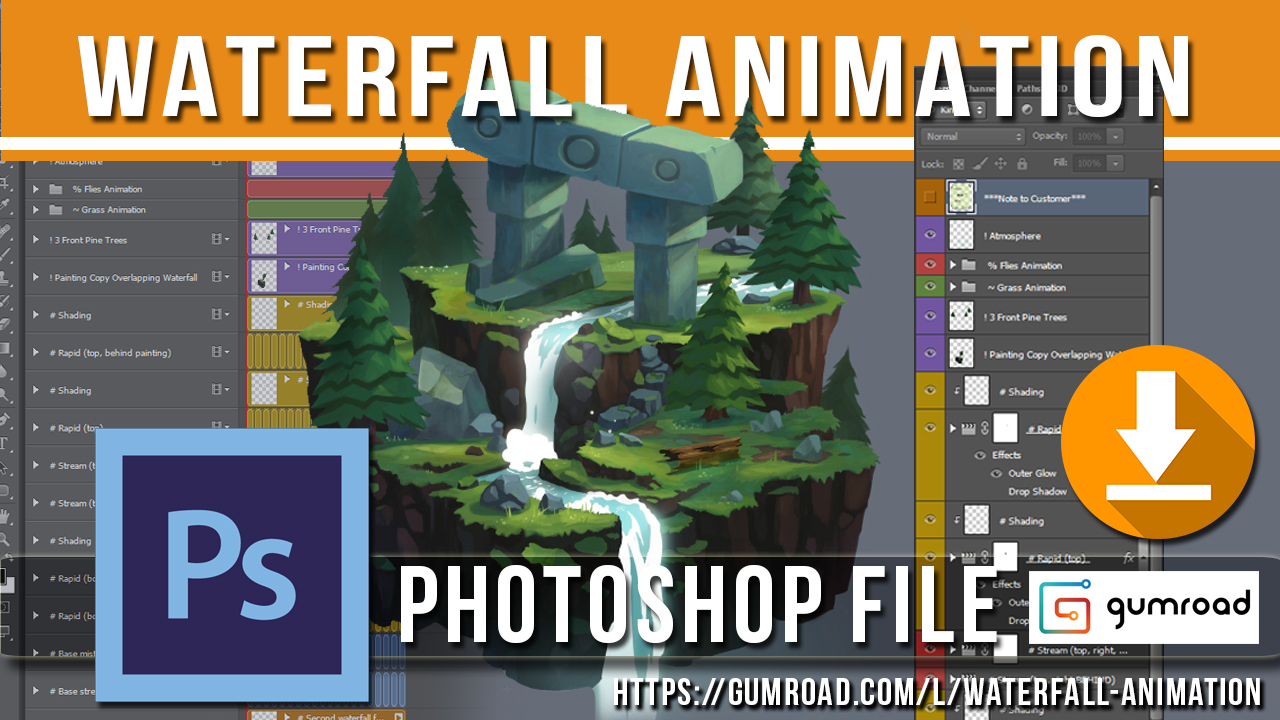
Would you like to see how I created this waterfall animation? Well give this photoshop file a download and dig through all the layers and frames!
Download Now ($2+) : Waterfall Animation (PSD) Photoshop File
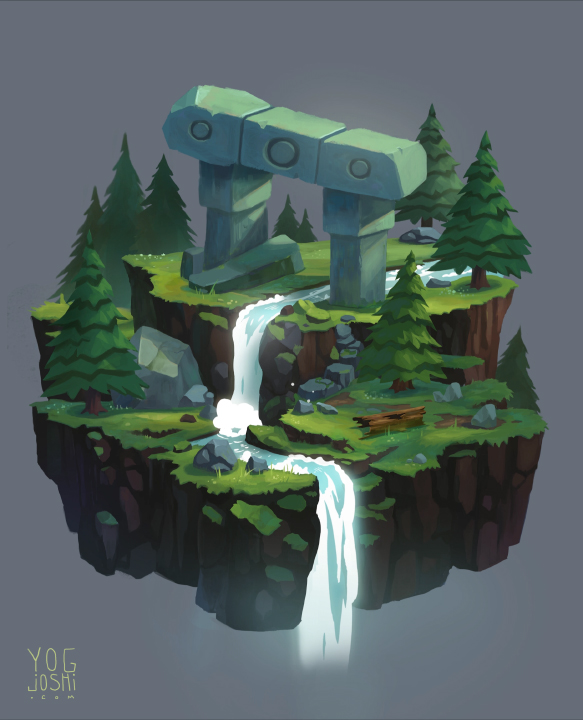
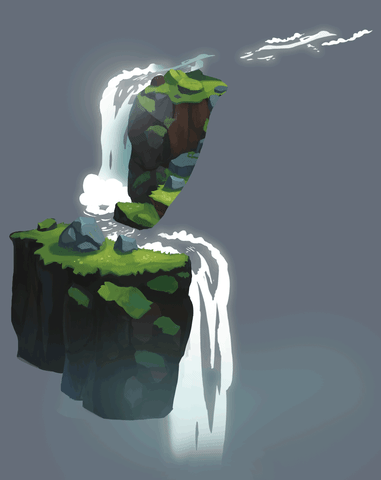
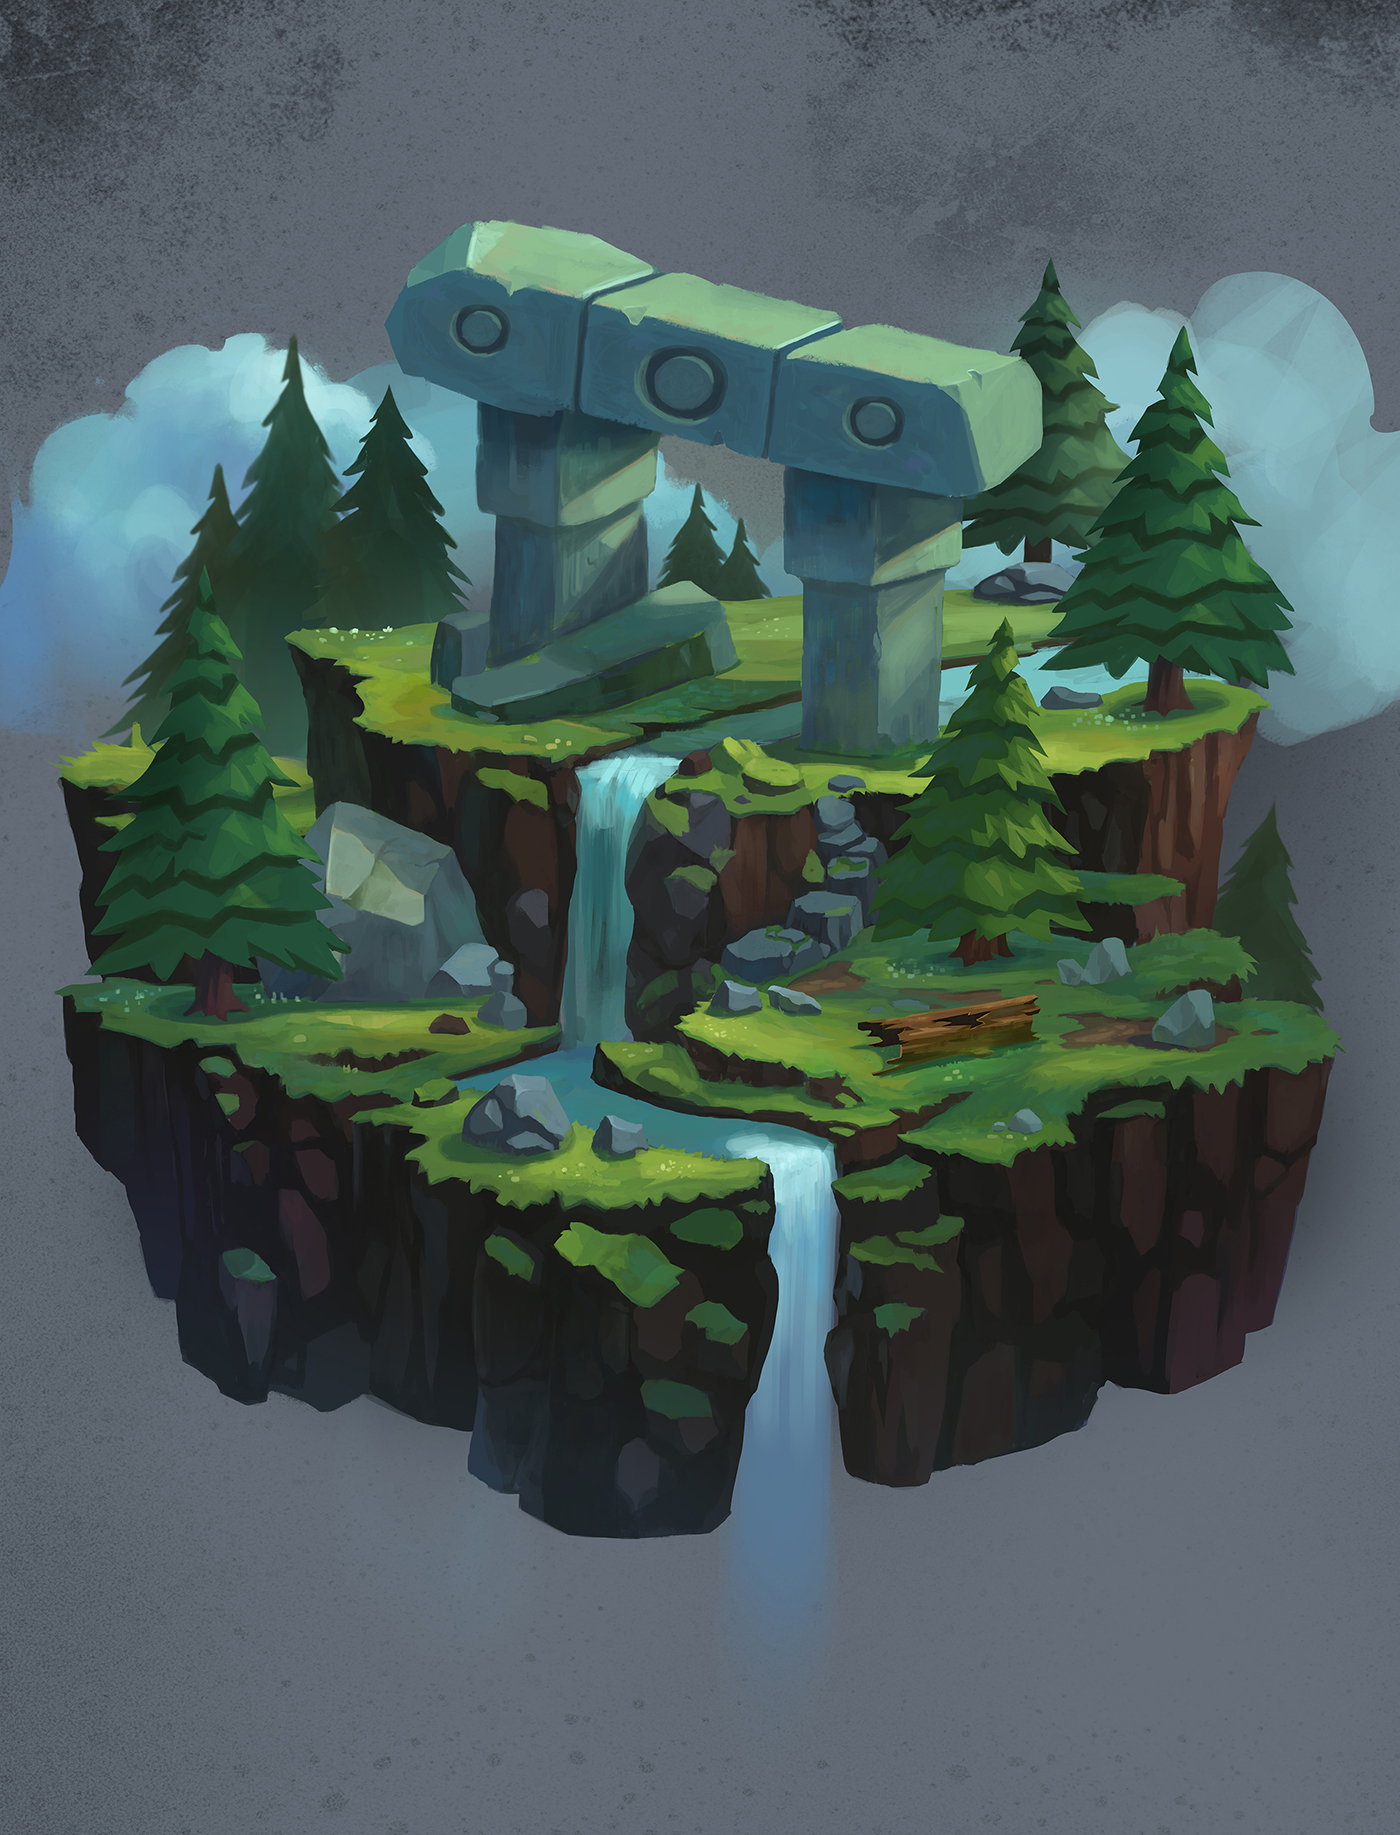
And finally, an image of the completed painting.
If you found this content helpful or inspiring, please consider supporting my art and website by Buying a Print, using my Resource List or making a small donation VIA PayPal. Thank you – Yog